Infrared proximity sensor circuit
obstacle detector circuit
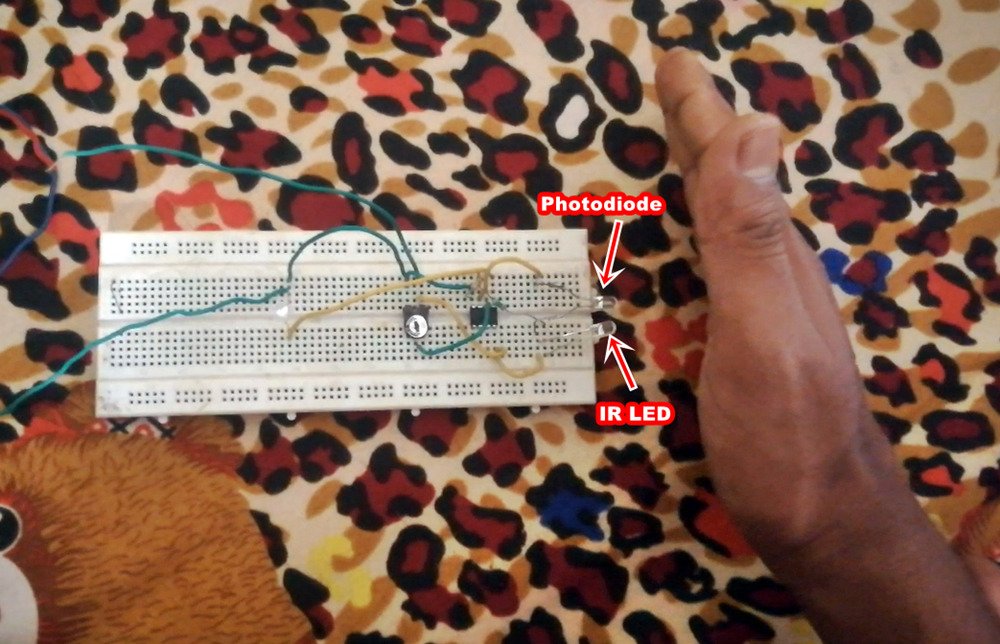
When an object comes near and in front of the IR sensor then the output of the circuit becomes HIGH. But when the object will keep far away from the IR sensor, the output will LOW automatically. This is the function of IR proximity or obstacle sensor. infrared proximity sensor circuit or Obstacle detector circuit – In this article, There is 3 infrared proximity sensor circuit that can be used as an obstacle detector circuit. When an object or your hand keep in front of about 0-5 cm, then the output will High.
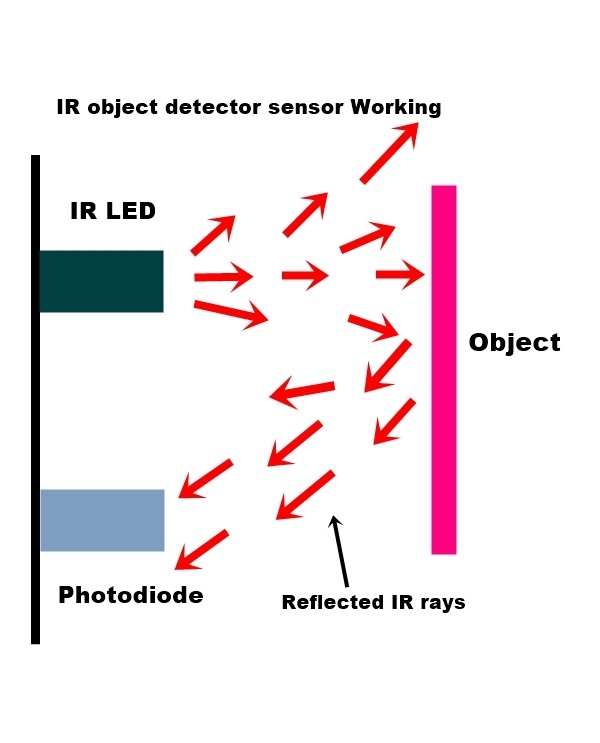
The infrared proximity sensor or obstacle sensor works basically on the principle of the radiation and reflection of Infrared light and rays.
In this system of IR obstacle detector or sensor, a transmitter and a receiver consist, Transmitter transmit the Infrared rays. These transmitted infrared rays reflected by the object and then these reflected rays is received by the receiver and according to the reflection of ir rays receiver activates the whole circuit and produces the output signal High or Low.
Transmitter
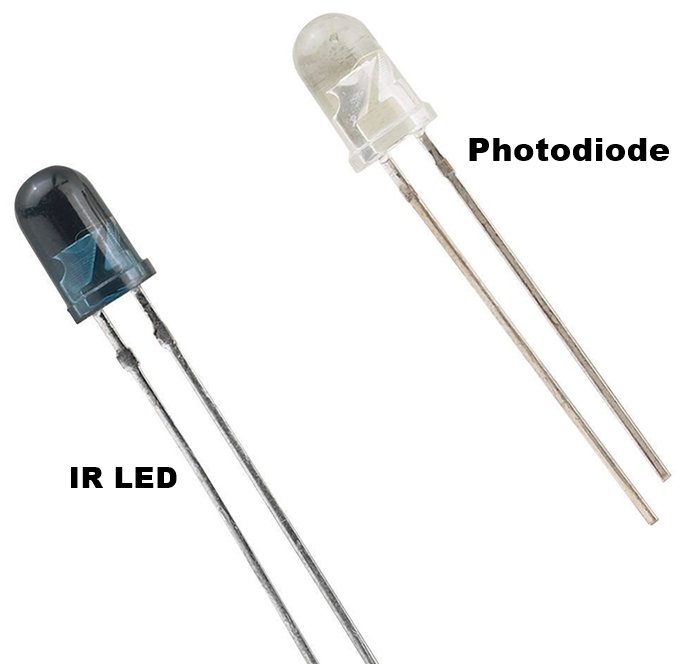
Transmitters are generally used as IR (Infrared) LEDs. IR LED is a special type of LED but looking the same as normal LED, This IR led transmits Infrared light or rays. Infrared lights are not directly visible to our eyes. IR LED is used here as the source of infrared light. The natural IR source is the sun; Sun is the largest source of infrared rays that produces a huge amount of IR rays in the environment.
Receiver
Generally, Photodiode used as IR receiver but phototransistors also used in many circuits for receiving the IR signals. Photodiode Is looking the same as LED. The size and design of a Photodiode is not like a general diode. It is a special type of diode made to receive only Infrared signals. Photodiode detects only ir signal.
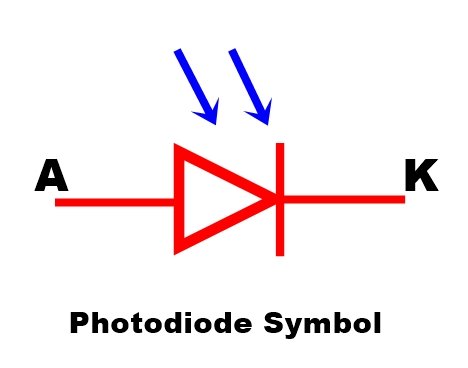
Photodiode converts light energy into electrical energy. Photodiode works on the principle of the photoelectric effect. This is a special type of p-n junction. The photodiode is always connected in reverse bias connection. When light (photon) falls on the p-n junction of photodiode then a very small electric field generated across this. Photodiode also called photodetector or photosensor. Current generated across photodiode is very small (in microamp).
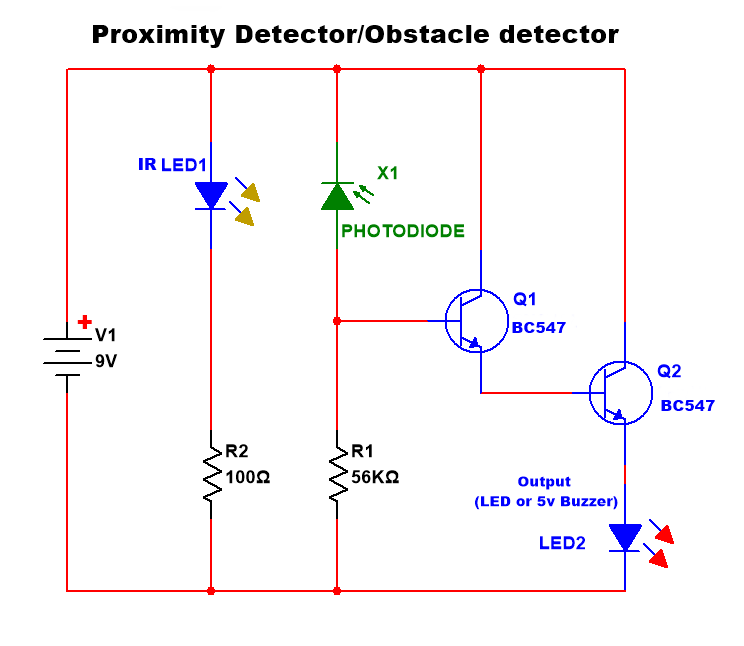
This circuit working is very simple. the photodiode is connected between the base of transistor Q1 and VCC. when an object or any reflective material present in front of the IR pair (transmitter-receiver) photodiode absorbs the IR rays and produces a small electric volt/current, which gives directly the base terminal of the transistor Q1, and then this transistor will activate. now, this transistor flows the current and gives at the base of Q2. A 56k resistor is used to remain the transistor OFF if the photodiode does not get IR signal.
Connect the IR LED and Photodiode in the same direction and distance between both are up to 1 to 2 cm.
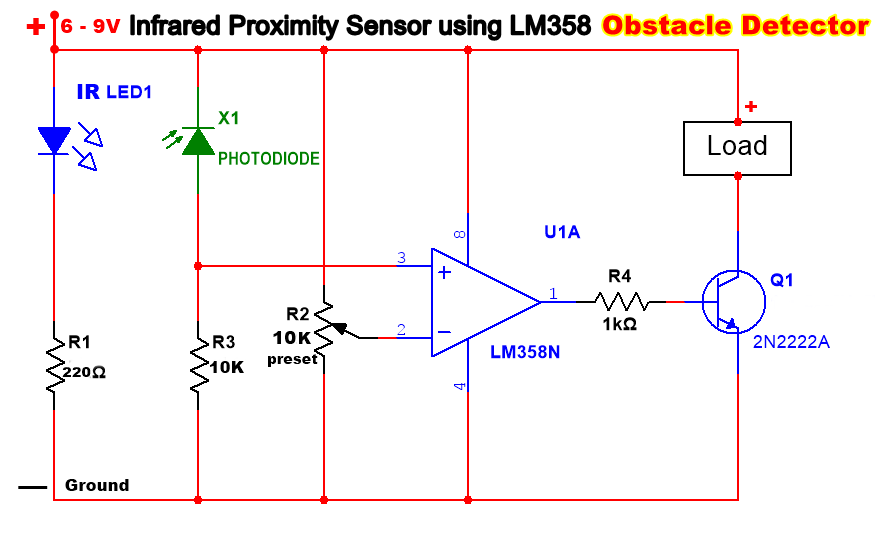
This circuit is more sensitive and more reliable. This uses an LM358 Ic, here LM358 ic uses as a comparator that compares the input voltage signal with the reference input voltage. When IR rays fall on the photodiode then the voltage level of pin 3 is higher than the reference voltage at pin 2, here voltage at pin 2 is uses as a reference voltage. When the voltage at pin 3 is the high, output voltage at pin 1 is High or the same as VCC otherwise the output voltage of the comparator at pin 1 is LOW or 0v. This output voltage activates the transistor and the load will turn on. the sensitivity of this circuit can be adjusted by the moving of the 10K preset.
Parts
IC LM358- 1
Photodiode -1
IR LED – 1
Resistors 1K-1, 220Ω- 1, 10K-1
Transistor 2N2222A – 1
Preset 10K- 1
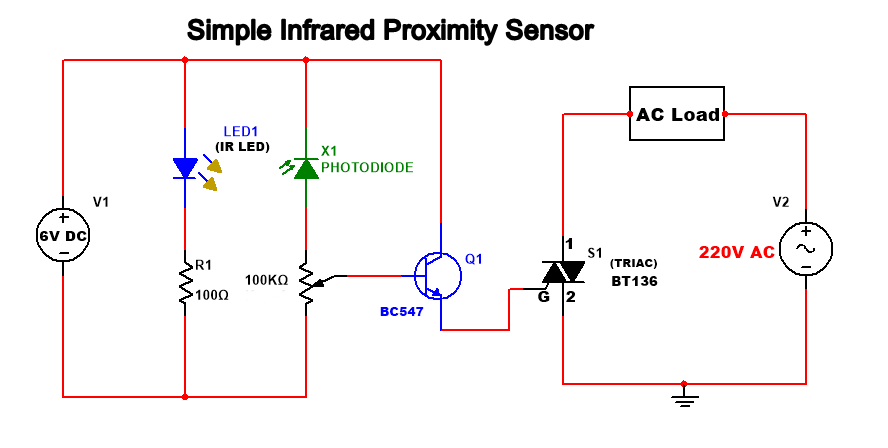
This circuit used for connecting to an AC load directly with the Triac. AC load will be connected with this circuit so this circuit is dangerous. When the IR rays fall on the photodiode, the base of the transistor gets a small voltage that activates this transistor. After activating this transistor the positive voltage signal goes to the gate pin of the triac and now triac will Turn on and activate the load connected with this. If you are a beginner with electronics and not experienced with AC please does not try this circuit. Here you can use an optocoupler to isolate the circuit from AC signal and for more safety.
Parts
IR LED and PHOTODIODE – 1
Resistor 100Ω -1
Preset 100K -1
TRIAC BT136 -1
Transistor BC547 – 1
video
Also read
-
What is Fusible resistor
-
IR Based Security Alarm Circuit
-
Overvoltage Protection AutoCut OFF Using 741
-
Dark sensor circuit – 4 circuit
-
Arduino Remote control 220v AC Without Relay

