Automatic water level controller for submersible motor
Introduction
This Project Is Very Useful, Interesting, And Very Effective. This Automatic Water Pump Controller With Three Stage Level Indicator Provides the Visual And Attractive LED Indication As Level Of the Water in Water Tank. When Tank is Full Then Motor Stops Automatically, In This Circuit No Use Of Any Timer IC.
• This is an Automatic submersible Motor controller
• The Main Advantage Of This Project Is To All Three LEDs Are Glowing One by One. Only One LED is Glowing At One Level And the Other Two Are in Off State.
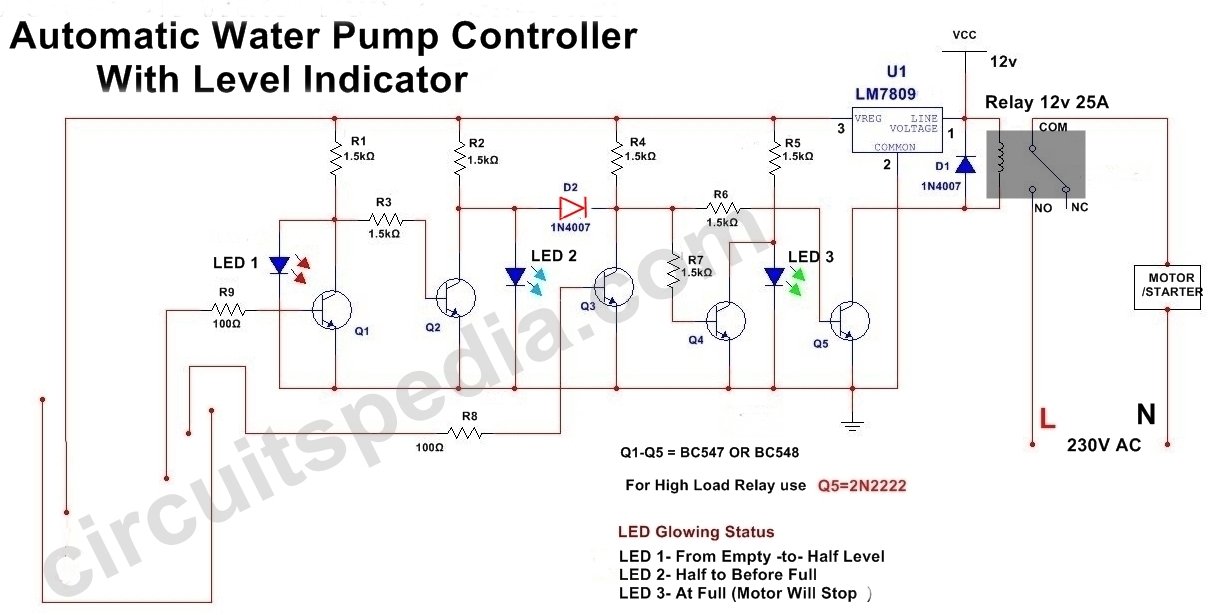
Schematic diagram
Click on image to large view
Construction
In This Project No Need Of Any Capacitor, No Timer IC. A Voltage Regulator IC LM7809, Some Resistors and Some NPN Transistors, Diode, LED, and a Relay are used In This Circuit.
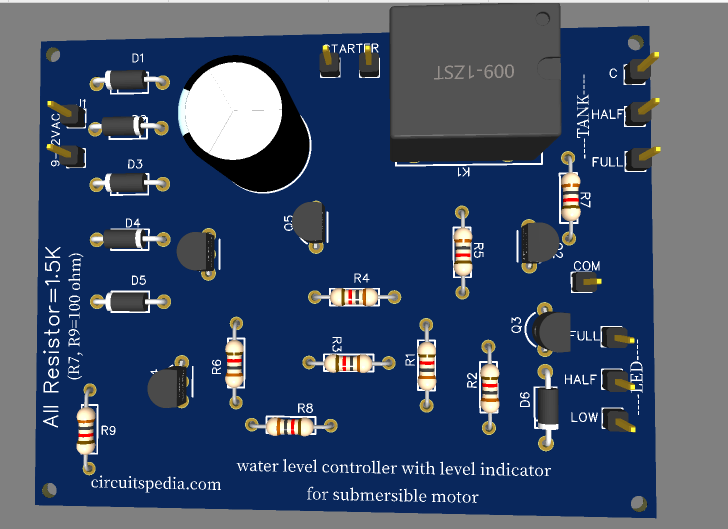
Connect All Components As Shown In the Image Diagram. The Value Of Resistors Are Should Not More Than 2kΩ. And Not Less Than 1kΩ. R8 And R9 Should Not be More Than 100 Ω. If All Values Are the Same As I recommend, Then Circuit Working Will be 100% Successful.
Arrange The One Wire Which Is Connected to VCC from More Than Half Level (Not Necessary To Fix The VCC wire From the Bottom). Second Wire Connect The Half Middle Of the Tank Or the Lower Than Half. And Third Wire Is Fix to Top Side Where You Want as a Requirement.
Working
First stage
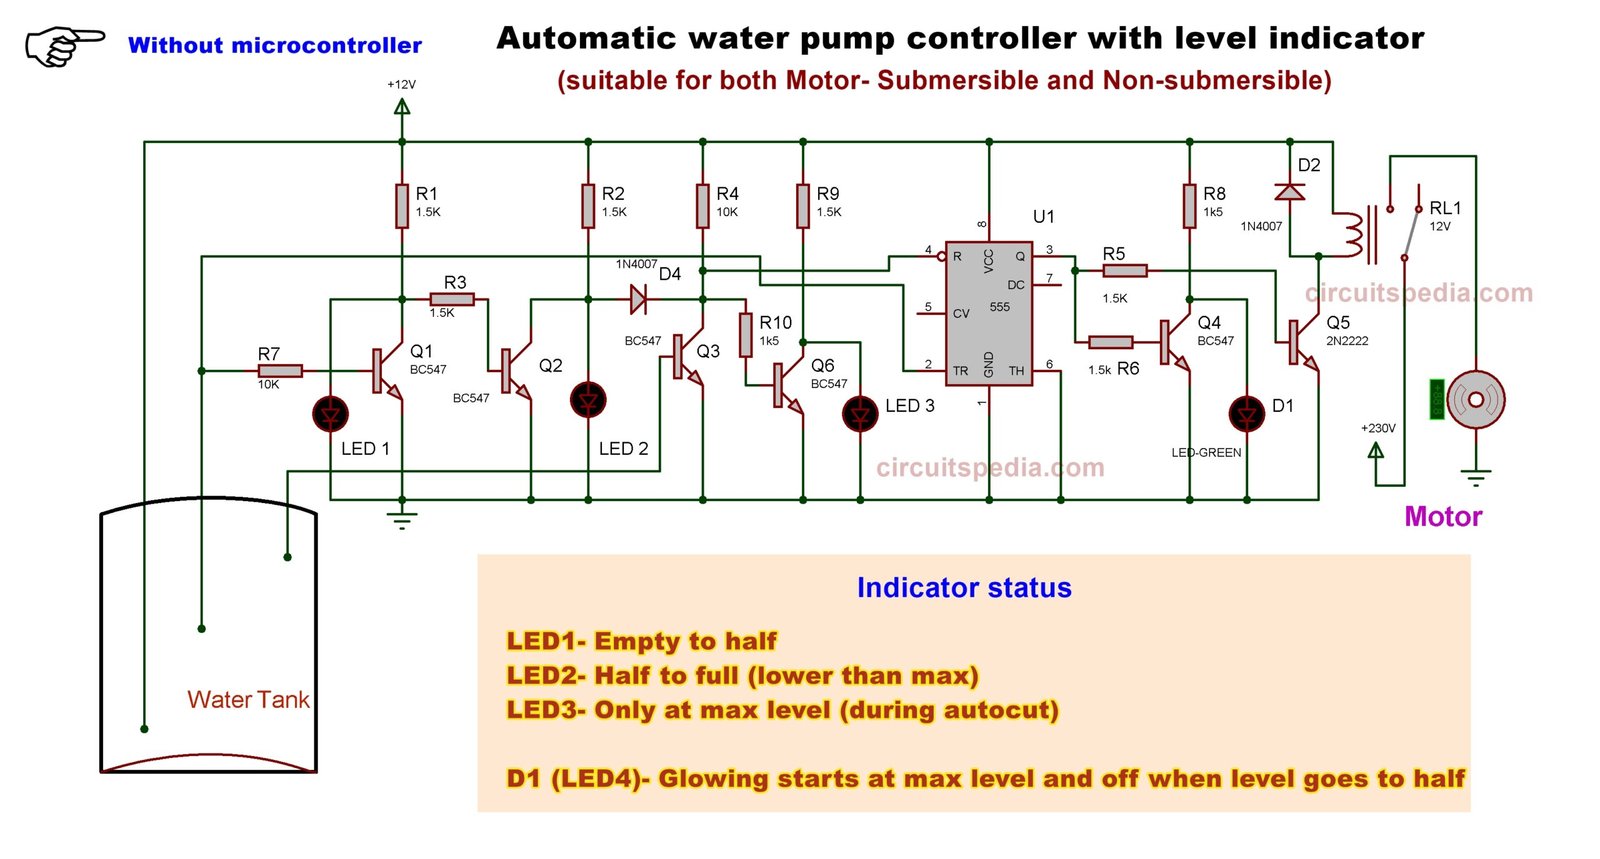
At First When There Is No Water In-Tank. This is the time to start the motor. LED 1 is Glowing, And the Relay Is Activated. So the Power to the motor is ON. Only LED 1 will glow until the water Level is About To Reach the Half Of the Tank. When the level of water has reached half the level and touches the middle wire of the tank, then the current from the VCC supply through the water goes to the BASE terminal of transistor Q1 and this will turn ON.
Transistor Q1 is connected as NOT Logic Circuit, So When the input of this on the base is +ve (ON) then the output at COLLECTOR Terminal Will be LOW (OFF), In this Case only LED 2 is now glowing And LED 1 is getting OFF.
The transistor Q5 remains ON State, which keeps Stay Relay Activated and the motor gets power.
Second and Third Stages
Now water is reached More than half and the middle and wire is sunk in the water, Only LED 2 Is glowing and all are OFF
At The Time Of When Water Reached To The Upper Wire And Touched That. As The Water Is Touched The Upper-Level Wire And Current At the Base Of Q3 is Getting Supply. Transistor Q3 in ON and LED 3 will Glow And On That Exact Time Transistor Q5 Will Get Turned OFF Because Transistor Q3 And Q5 Are in Connected As Inverter Logic(Not GATE) Which Make The Output At Collector of Q3 is LOW, the Base Of Q5 In LOW input and Q5 Turned Off. This is The Reason For Relay to Deactivate When the Tank Is Full. All Emitter Terminals of Transistors Is Grounded(-ve supply).
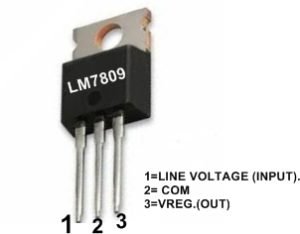
The Purpose of the LM7809 voltage regulator in this Circuit is to Divide The Supply Into Two Sections. One Is For the Relay, and the Other is for the whole Circuit. If the LM7809 regulator is not connected, then The Maximum Power is consumed by the Relay and the LED does not flow in a Proper way.
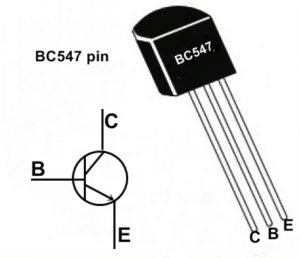
Carefully Connect Terminals Of Transistors And Voltage Regulator ic LM7809. The relay Must Be More Than 20A.
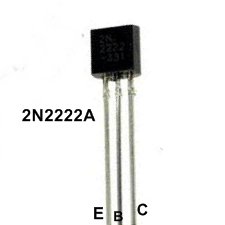
If Q5 BC547 gets burned or hotter, then You Can Use 2N2222.
You Can Use Tricolor LED in Place of 3 Different LEDs. But only Common Cathode Tricolor LED. This LED Makes its Different Look.
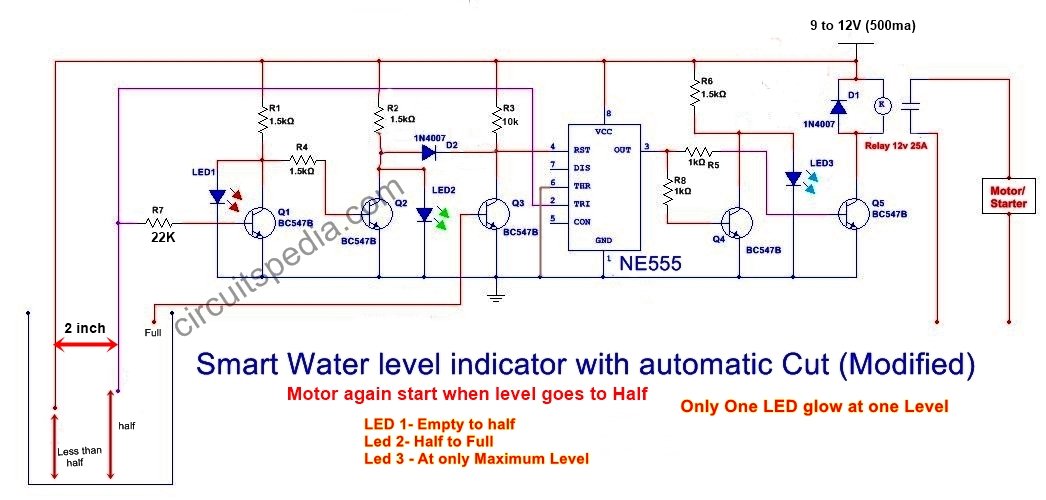
2nd Schematic diagram
(suitable for both Motor- Submersible and Non-submersible)
3rd Schematic diagram
Part list of 3rd schematic
Resistors
10K-2, 1.5K-8
Diode – 2
555Timer ic -1
Transistor BC547-5, 2N2222-1
Relay- 12v 20A
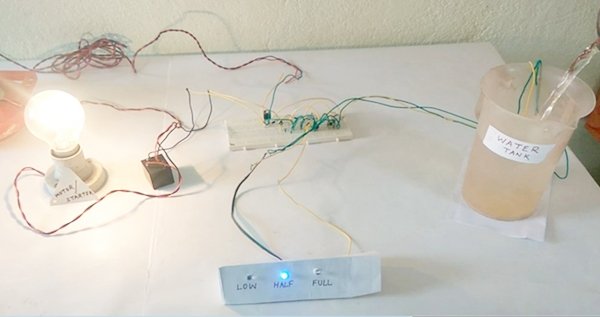
Must Watch Demo Video.
Video is of 1st circuit
Simulation video of 3rd circuit
Must Read 2 Digit Digital Object Counter
Must Read Simple ON OFF Touch Switch For Light/Fan
The power supply must be 12 v DC. If the Power Supply Is LESS than 12v on pin 1 of 7809, then the circuit may not work correctly.
Components
Resistor
1.5K- 9
100 ohm-2 (optional)
Transistor
BC547 -5
Diode
1N4007-2
LED-3 Or Tricolor LED-1
Relay
12v 20A-1
Voltage Regulator IC
LM7809-1
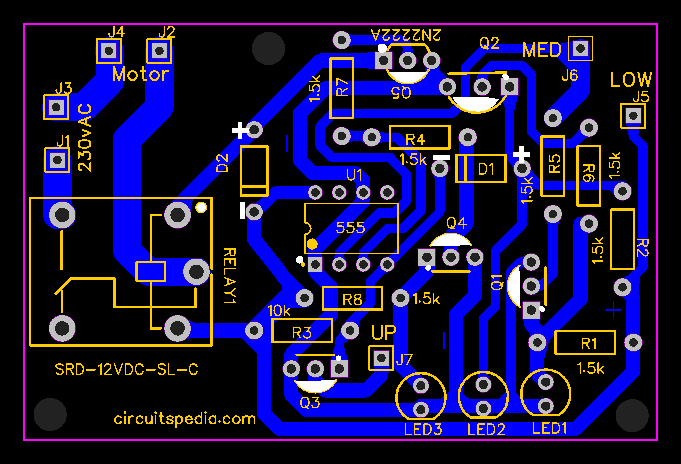
PCB layout of 1st circuit
download Actul size printable image of PCB Layout
Also Read
-
Remote Controlled ON-OFF Switch
-
Dark Sensor Circuit
-
Single Touch ON OFF Switch Using 555 And 4017
-
Bird Sound Generator Circuit Using Arduino



I’ve been absent for a while, but now I remember why I used to love this blog. Thanks, I will try and check back more often. How frequently you update your website?
please help me my dear i make this project for final year gradution project but when the tanker is empity no problem the pump automatically start,and achive the final max level it goes off. the main problem is that when the senser of the top maxlevel is lose the water the motor automatically start why b/c the pump atlist atart to full the tank below the midium but this project start to fill below the higher level please tell me the problem .
You use this circuit,
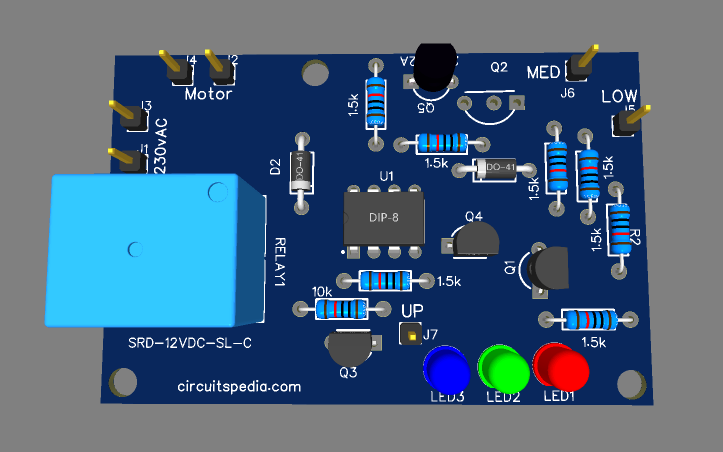
This is Modified and Motor will not start until level go to Half.
Image
Thank You Very Much
Thanks for sharing excellent informations. Your web site is very cool. I am impressed by the details that you?¦ve on this website. It reveals how nicely you perceive this subject. Bookmarked this web page, will come back for more articles. You, my pal, ROCK! I found just the information I already searched everywhere and simply could not come across. What a perfect web-site.
Useful info. Lucky me I discovered your site by accident, and I am stunned why this accident did not happened earlier! I bookmarked it.
Hi there! This post couldn’t be written any better! Reading through this post reminds me of my previous room mate! He always kept talking about this. I will forward this article to him. Pretty sure he will have a good read. Thank you for sharing!
I really value your work, Great post.
Wow, gorgeous site. Thnx …
If you are going for best contents like myself, only pay a visit this web page all the time because it offers quality contents, thanks
thanks for the info very interesting .
Welcome
Enjoyed studying this, very good stuff, thanks.
Regards for this post, I am a big big fan of this web site would like to continue updated.