Remote Controlled Switch
This is the very simple circuit diagram of the IR remote control switch. We use the normal switch in our daily life and after a long time used to this switching system, we can no more interested in that. This is a good solution for a unique and so interesting idea to a wireless switching system to control the home appliance. IR (Infrared) Remote controlled switch circuit diagram for Light/Fan Appliance
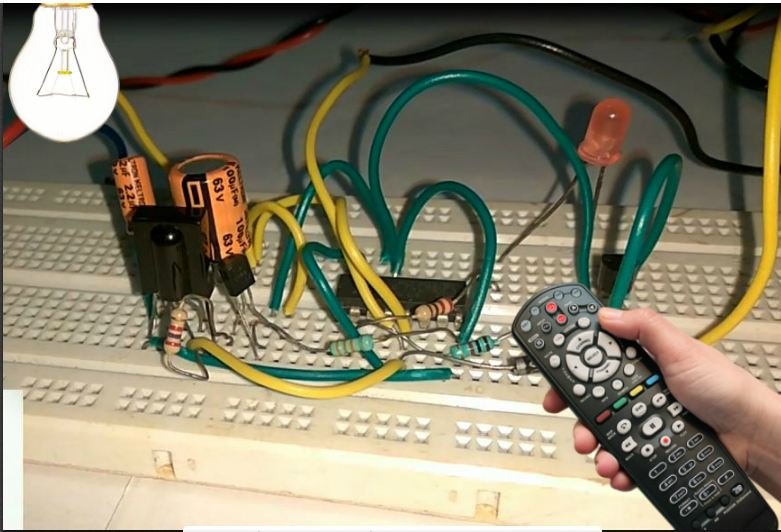
This homemade wireless remote-controlled switch system is very easy to construct and can change our living experience. TSOP1738 is used in the circuit for sensing the infrared signal output from the remote. Here we can use any tv, USB player or DVD remote and it works up to a 10-meter distance.
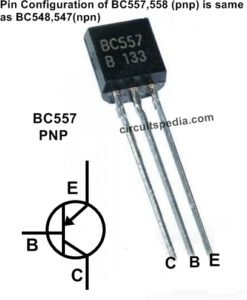
The output signal from TSOP1738 is applied to PNP transistor 557. The amplified signal from transistor Q1 is fed to pin no 14 of ic.
Remote control on-off switch circuit diagram
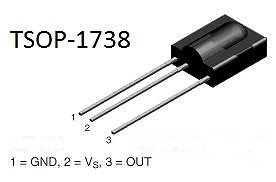
TSOP1738 is the IR receiver module.TSOP 17…. Series Photomodules are miniature IR sensor modules with PIN photodiode and a preamplifier stage enclosed in an epoxy case. Its output is active low and gives +5 V when off. The important features of the module include an internal filter for PCM frequency, TTL and CMOS compatibility, low power consumption (5 volts and 5 mA), immunity against ambient light, noise protection, etc. 1738 is sensitive for 38khz frequency.
TSOP 1730 5V 30 kHz
TSOP 1736 5V 36 kHz
TSOP 1738 5V 38 kHz
TSOP 1756 5V 56 kHz
Photo modules are 3 pin devices. These pins are assigned for +V,–V and output. The pin assignment of the TSOP 17… series from the front side (projected side) is Pin 1 Ground, Pin 2 + 5V and pin 3 Output. The photo module requires a regulated 5V supply. If the supply voltage increases, the device will be destroyed.
Working of a remote controlled switch
When the Remote is not pressed then the output of the TSOP sensor is HIGH. After pressing any key button of the remote the output of the sensor goes LOW for a Moment. In this case, the input clock pulse is changed for a moment at pin no 14 of IC 4017. As the Clock pulse is changed the State of This Ic is changed also and then the output is changed. The output is Remain in the same state Until the Clock pulse at pin no is changed therefore as result the remote is able to change the state of 4017 and the output turns ON and turns OFF the transistor and Connected Load is Switched ON and Switched OFF after Every Key Pressing Of remote.
is a CMOS decade counter cum decoder circuit that can work out of the box for most of our low-range counting applications. It can count from zero to ten and its outputs are decoded. This IC also simplifies the design and makes debugging easy.
Pin-14 is the clock input. This is the pin from where we need to give the input clock pulses to the IC. The output is connected with pin 2. It goes high when the counter reads 0 counts. one LED is connected with pin 3 to indicate when switched off appliances. Transistor BC547 is used to control the relay.
Few components required to construct this remote-controlled switch circuit which makes its so simple and smaller size.
use a 5 v regulated power supply to operate this circuit and place IR receiver as front-facing and can easily receive signals from the remote.
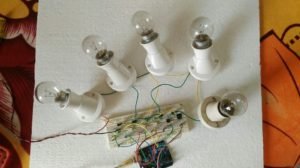
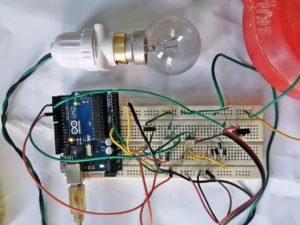
Here is a Demo Video of this Project. Please Watch This video
Components
IC 4017-1
Transistor-
BC557 or 558-1 , BC547 or 548 -1
Resistor-
470ohm-1, 1K-1 , 2.5K-1, 30K-1
Capacitor –
100uf 25v-1 , 2.2uf 25v-1
Diode-1N4007-1
Relay- 5v 6A
Must Read Remote Controlled Switch using 555 Timer Ic




Muito interessante e astuto, como você gosto de aprender e entender, conhecimento se adquire não se ganha.
Valeu .
CAN WE SET IT TO ANY SINGLE SELECTED BUTTON?
I Think No
Yes by suitable design and biasing it is possible to set the desired level
Great post! I found the circuit diagram easy to follow, and the explanations were really clear. I’m excited to try building the IR remote switch. Thanks for sharing!
Great post! The detailed explanation of the IR remote control switch circuit was incredibly helpful. I appreciate the step-by-step guide and the helpful tips for troubleshooting. Can’t wait to try building this myself!